
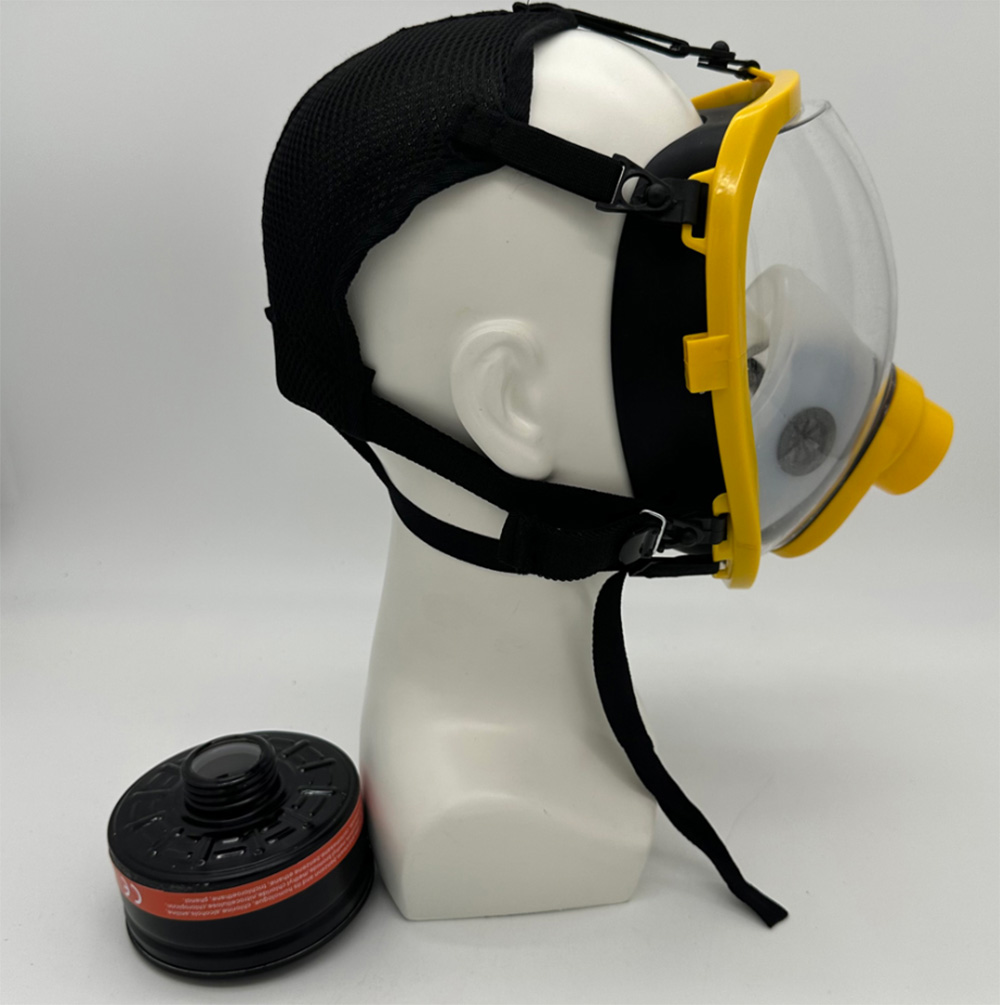
A full face respirator looks like a single piece of equipment. But inside that seemingly simple mask are five core components—each with a critical job. If any one of these components fails, the entire respirator stops protecting the wearer.
At Junsee Group, we believe that understanding your equipment is the first step to using it correctly. This article breaks down the five essential parts of a full face respirator, explaining what each component does, how to maintain it, and when to replace it.
The facepiece body is the main structure of the respirator—the flexible material that seals against the wearer's face and holds all other components.
| Function | Explanation |
|---|---|
| Creates the seal | The edge of the facepiece (called the sealing surface) contacts the forehead, temples, cheeks, and chin to form a airtight barrier |
| Holds all components | The visor, filter cartridges, exhalation valve, and head harness all attach to the facepiece body |
| Provides structural integrity | Maintains shape during inhalation (negative pressure) so the mask does not collapse |
| Material | Properties | Best For |
|---|---|---|
| Silicone | Soft, flexible, durable, easy to clean, hypoallergenic, excellent seal | Long shifts, daily use, workers with sensitive skin |
| Rubber / Elastomer | Stiffer than silicone, very durable, lower cost than silicone | General industrial use, occasional use |
| Thermoplastic elastomer (TPE) | Lightweight, good chemical resistance, moderate cost | Chemical environments, specialized applications |
| Quality Indicator | What to Look For |
|---|---|
| Sealing surface | Smooth, no mold lines or imperfections that could cause leaks |
| Flexibility | Material should be supple—not stiff or cracked |
| Thickness | Consistent thickness throughout; no thin spots |
| Chemical resistance | Material should resist degradation from workplace chemicals |
| Action | Frequency |
|---|---|
| Clean after each use | Mild soap and warm water—never solvents |
| Inspect for cracks, tears, or deformation | Before each use |
| Check sealing surface for damage | Weekly |
| Replace facepiece | Every 3-5 years, or immediately if damaged |
✅ Junsee Group tip: A facepiece that has become stiff, discolored, or cracked cannot form a proper seal. Replace it immediately—do not try to "make it work."
The visor (also called the lens or faceshield) is the transparent front of the respirator. It protects your eyes and face while allowing you to see clearly.
| Function | Explanation |
|---|---|
| Protects eyes | Blocks chemical splashes, flying particles, and irritating gases from reaching the eyes |
| Protects face | Covers the entire front of the face—nose, mouth, cheeks, forehead |
| Provides vision | Must remain clear and distortion-free for safe work |
| May provide impact protection | Rated to ANSI Z87.1 or EN 166 for high-speed particles (depending on model) |
| Material | Impact Resistance | Chemical Resistance | Scratch Resistance | Optical Clarity | Typical Use |
|---|---|---|---|---|---|
| Polycarbonate | Excellent | Poor (attacked by many solvents) | Poor (scratches easily) | Good | Impact hazards (grinding, construction) |
| Polyacetate (Cellulose acetate) | Good | Good (resists many chemicals) | Moderate | Excellent | Chemical splash, laboratory |
| Treated polycarbonate (with coating) | Excellent | Moderate (coating adds protection) | Good (coated) | Good | General industrial with anti-scratch/anti-fog |
| Glass | Poor (can shatter) | Excellent | Excellent | Excellent | Specialty (rare—heavy and dangerous if broken) |
| Coating | Benefit |
|---|---|
| Anti-fog | Prevents condensation from exhaled breath—critical in humid or cold environments |
| Anti-scratch | Extends visor life in abrasive environments (dust, sand, fibers) |
| Anti-UV | Protects eyes from ultraviolet radiation (welding, outdoor work) |
| Anti-static | Reduces dust attraction—keeps visor cleaner longer |
| Quality Indicator | What to Look For |
|---|---|
| Optical clarity | No distortion, waves, or bubbles in the material |
| Field of view | Wide—should not restrict peripheral vision |
| Coating integrity | Anti-fog coating should be uniform; no peeling |
| Impact marking | Look for "Z87+" (ANSI) or "EN 166" markings for impact rating |
| Action | Frequency |
|---|---|
| Clean with soft cloth and mild soap | After each use |
| Never use paper towels (they scratch) | — |
| Check for scratches that impair vision | Before each use |
| Check for crazing (fine cracks from chemical exposure) | Weekly |
| Replace visor | Immediately if scratched beyond clear vision, cracked, or crazed |
✅ Junsee Group tip: A scratched or crazed visor is not just annoying—it can cause visual distortion that leads to accidents. Replace visors proactively.
The exhalation valve is a simple but critical component. It allows exhaled breath to leave the respirator while preventing contaminated air from entering.
| Function | Explanation |
|---|---|
| Releases exhaled air | Prevents buildup of hot, humid breath inside the facepiece |
| Prevents contaminant entry | The valve flap closes during inhalation, sealing the respirator |
| Reduces breathing resistance | Makes exhalation easier than breathing through filter media |
| Phase | Valve Position | Airflow |
|---|---|---|
| Inhalation | Valve flap pressed closed by negative pressure | Air enters only through filter cartridges |
| Exhalation | Valve flap pushed open by positive pressure | Exhaled air exits through valve opening |
| Part | Material | Function |
|---|---|---|
| Valve seat (base) | Hard plastic or rubber | Provides flat surface for flap to seal against |
| Valve flap (diaphragm) | Thin silicone or rubber | The moving part that opens and closes |
| Valve cover (protective cage) | Plastic | Protects flap from damage; directs exhaled air downward |
| Symptom | Cause | Action |
|---|---|---|
| Flap does not lie flat | Curled, warped, or dirty valve flap | Clean or replace flap |
| Flap sticks open | Debris, sticky residue, or damage | Clean or replace flap |
| Flap does not open (hard to exhale) | Flap stuck to seat (moisture adhesion) | Clean and dry thoroughly |
| Condensation on visor | Valve may be partially blocked | Inspect and clean valve |
| Action | Frequency |
|---|---|
| Inspect flap for curling, cracks, or debris | Before each use |
| Clean valve seat and flap with mild soap | After each use |
| Ensure valve is completely dry before reassembly | After cleaning |
| Replace valve flap | Every 6-12 months, or immediately if damaged |
✅ Junsee Group tip: A faulty exhalation valve is one of the most common reasons for fit test failure. Replace valve flaps on a schedule—do not wait for them to fail visibly.
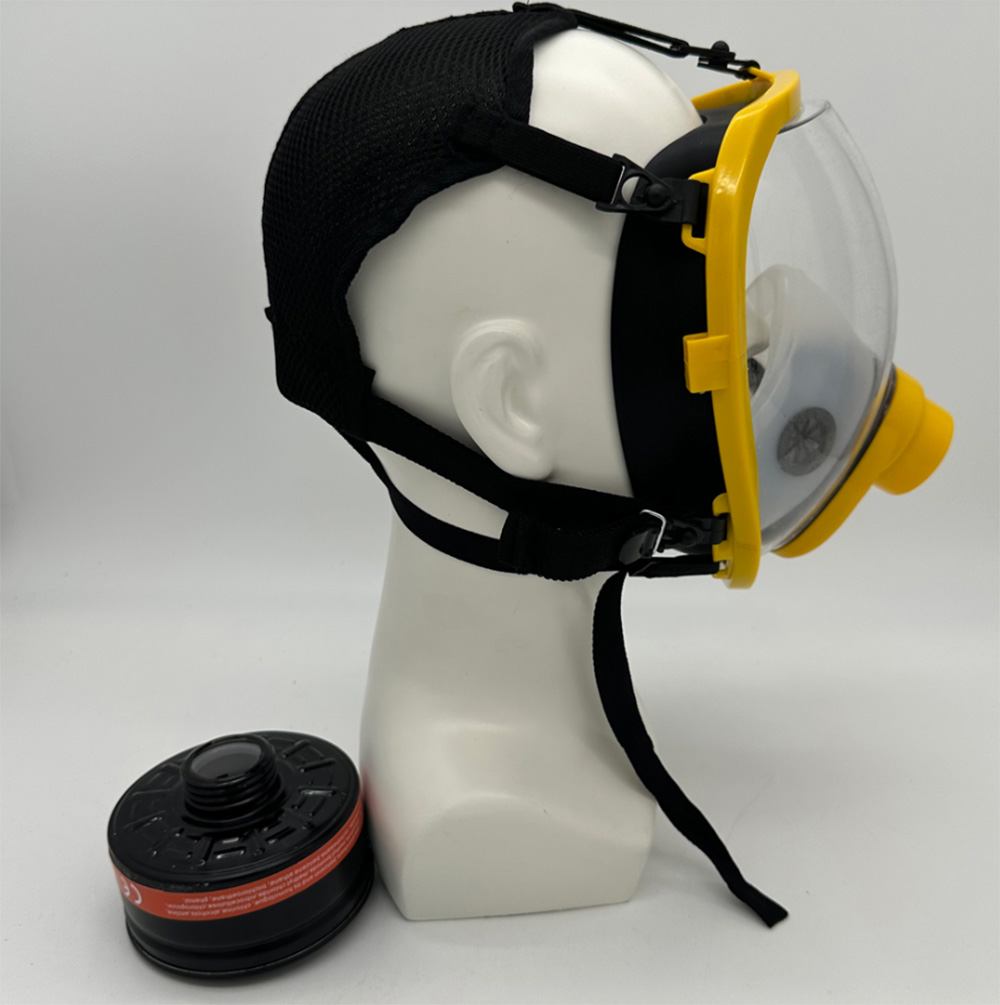
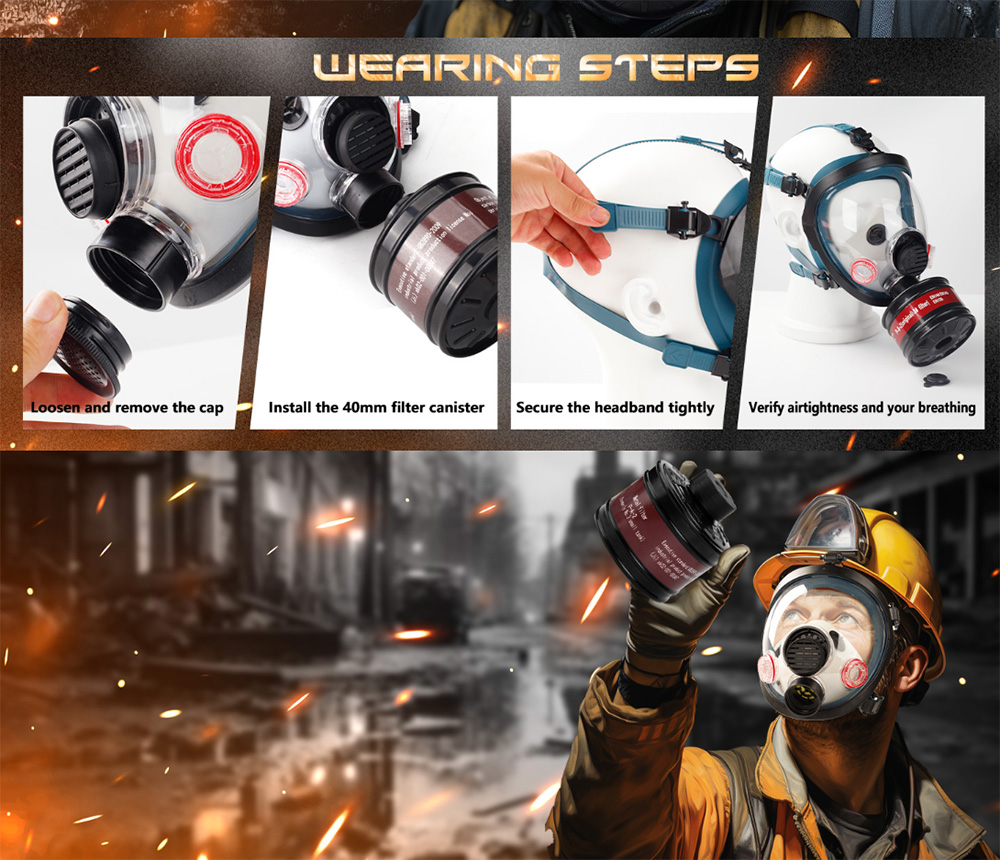
Filter cartridges (also called canisters or filters) remove contaminants from the air before you inhale. They are the "business end" of the respirator.
| Function | Explanation |
|---|---|
| Remove particulates (dust, fumes, mists) | HEPA or P-series filters capture solid and liquid particles |
| Remove gases and vapors | Activated carbon and other adsorbents trap chemical molecules |
| Remove both (combination filters) | Particulate filter layered with activated carbon |
| Filter Type | Contaminants Removed | Color Code (EN) | Typical Application |
|---|---|---|---|
| Particulate only (P100, HEPA) | Dust, fumes, mists, bioaerosols | Magenta (NIOSH) / None (EN—separate rating) | Grinding, welding, construction |
| Organic vapor (A) | Solvents, paints, gasoline, benzene | Brown | Spray painting, chemical mixing |
| Acid gas (B) | Chlorine, sulfur dioxide, hydrogen chloride | Grey | Chemical plants, water treatment |
| Ammonia (K) | Ammonia, methylamine | Green | Refrigeration, fertilizer, cleaning |
| Multi-gas (ABEK) | Organic vapors + acid gases + ammonia | Olive / Yellow | Unknown or mixed hazards |
| Combination (e.g., A2P3) | Organic vapors + particulates | Brown + particulate color | Spray painting (mist + vapors) |
| Class | Capacity | Best For |
|---|---|---|
| Class 1 (e.g., A1) | Low capacity | Low concentration, short duration |
| Class 2 (e.g., A2) | Medium capacity | General industrial use |
| Class 3 (e.g., A3) | High capacity | High concentration, long duration |
| Rating | Minimum Efficiency | Color |
|---|---|---|
| P1 | 80% | White |
| P2 | 94% | White (or none) |
| P3 | 99.95% | White |
| Rating | Minimum Efficiency | Color |
|---|---|---|
| N95 / R95 / P95 | 95% | — |
| N99 / R99 / P99 | 99% | — |
| N100 / R100 / P100 | 99.97% | Magenta |
| Quality Indicator | What to Look For |
|---|---|
| Certification marking | NIOSH (US) or CE (Europe) approval number on each cartridge |
| Sealed packaging | Gas cartridges must be individually sealed until use—carbon absorbs ambient vapors over time |
| Expiration date | Gas cartridges have a shelf life (typically 3-5 years unopened) |
| Color code | Matches EN standard for quick identification |
| Filter Type | Replacement Indicator | Typical Lifespan |
|---|---|---|
| Particulate filter | Increased breathing resistance; visible loading | 40 hours of use or when clogged |
| Gas cartridge | Smell or taste of contaminant; time-based schedule | Varies (8-40 hours depending on concentration) |
| Combination filter | Whichever comes first | Follow most conservative rule |
⚠️ Critical warning: Unlike particulate filters (which get harder to breathe through), gas cartridges provide no physical warning of saturation. You may breathe contaminated air without knowing it. Replace on schedule or immediately if you smell/taste anything.
The head harness (also called head straps or head assembly) holds the respirator firmly against the face. Without a properly adjusted harness, even a perfect facepiece will leak.
| Function | Explanation |
|---|---|
| Positions the respirator | Centers the facepiece correctly on the face |
| Creates tension | Pulls the facepiece against the face to create the seal |
| Distributes pressure | Spreads tension across multiple straps to avoid pressure points |
| Allows adjustment | Different head sizes require different strap lengths |
| Part | Material | Function |
|---|---|---|
| Upper straps (two) | Elastic or fabric with buckles | Pull the upper part of facepiece against forehead |
| Lower straps (two) | Elastic or fabric with buckles | Pull the lower part of facepiece against chin |
| Neck strap (some models) | Fabric | Provides additional stability around the neck |
| Buckles or clips | Plastic | Allow length adjustment |
| Head cradle (some models) | Plastic or fabric frame | Holds straps apart; easier donning |
| Configuration | Description | Best For |
|---|---|---|
| 4-strap (two upper, two lower) | Most common; provides even tension | General industrial use |
| 5-strap (three upper, two lower) | Additional forehead tension | Large facepieces, high negative pressure applications |
| Ratchet harness | Adjustable dial at back of head | Quick adjustment; easy don/doff |
| Step | Action |
|---|---|
| 1 | Loosen all straps fully |
| 2 | Place facepiece on face |
| 3 | Pull bottom straps first—tighten evenly |
| 4 | Pull top straps—tighten evenly |
| 5 | Perform user seal check |
| 6 | Adjust as needed (tighter is not better—over-tightening distorts the facepiece) |
✅ Junsee Group tip: Over-tightening straps is a common mistake. Straps should be snug but comfortable. If the facepiece distorts or you feel pressure points, loosen slightly.
| Symptom | Cause | Action |
|---|---|---|
| Straps no longer stretch | Elastic worn out | Replace straps |
| Straps slip during use | Buckles worn or elastic weak | Replace harness |
| Buckles cracked or broken | Impact or chemical damage | Replace buckle or entire harness |
| Head cradle cracked | Impact or age | Replace harness |
| Action | Frequency |
|---|---|
| Inspect straps for elasticity and cracks | Before each use |
| Check buckles for damage | Weekly |
| Clean straps with mild soap and water | After each use (if heavily soiled) |
| Replace head harness | Every 1-2 years, or immediately if damaged |
| Component | Role in the System |
|---|---|
| Facepiece body | Creates the seal against the face |
| Visor | Protects eyes and face; provides vision |
| Exhalation valve | Allows exhaled breath to exit |
| Filter cartridges | Removes contaminants from inhaled air |
| Head harness | Holds everything in place with proper tension |
| Phase | Component Actions |
|---|---|
| Inhalation | Negative pressure inside facepiece → Exhalation valve flap seals closed → Air is drawn through filter cartridges → Clean air enters facepiece → Wearer inhales |
| Exhalation | Positive pressure inside facepiece → Exhalation valve flap opens → Warm, moist exhaled air exits → Valve closes again, ready for next inhalation |
| Component | Main Function | Key Maintenance | Replacement Frequency |
|---|---|---|---|
| 1. Facepiece body | Seals against face | Clean after each use; inspect for cracks | 3-5 years |
| 2. Visor | Protects eyes/face; provides vision | Clean with soft cloth; check for scratches | When scratched beyond clear vision |
| 3. Exhalation valve | One-way exit for breath | Clean flap and seat; check for curling | Flap: 6-12 months |
| 4. Filter cartridges | Removes contaminants | Replace on schedule or when saturated | 40 hours (particulate) or when smelled (gas) |
| 5. Head harness | Holds respirator on face | Check elasticity; inspect buckles | 1-2 years |
A: Most full face respirators have replaceable visors. Check your model—many allow you to replace the visor without replacing the entire facepiece body. This is much more economical.
A: Perform this simple test:
Block the filter inlets with your palms
Inhale gently—the facepiece should collapse slightly and stay collapsed (no air leaking in)
Exhale—you should feel air exiting through the valve with minimal resistance
If air leaks in during inhalation, the valve flap is not sealing properly
A: Not recommended. Different manufacturers use different threads, sealing surfaces, and certification standards. Use only cartridges specified by your respirator's manufacturer for that model. Mixing brands can create leaks and voids NIOSH/CE certification.
A: Snug but comfortable. You should be able to:
Wear the respirator for several hours without pressure pain
Move your head without the facepiece shifting
Pass a user seal check (covering filter inlets and inhaling—facepiece should collapse slightly)
Over-tightening distorts the facepiece and can actually cause leaks.
A:
Use a soft, lint-free cloth (microfiber is ideal)
Never use paper towels, tissues, or rough fabrics—they scratch
Use mild soap and warm water
Rinse thoroughly
Air dry or pat dry with soft cloth
Never use solvents, alcohol, or abrasive cleaners on polycarbonate visors
A full face respirator is a precisely engineered safety device. Its five core components—facepiece body, visor, exhalation valve, filter cartridges, and head harness—must all function correctly for the respirator to provide adequate protection.
| Key Principle | Why It Matters |
|---|---|
| Inspect before each use | Catches component failures before exposure |
| Replace consumables on schedule | Filters and valve flaps wear out |
| Clean after each use | Extends component life and prevents contamination |
| Use only manufacturer-specified parts | Ensures proper fit and certification |
| Never modify components | Drilling holes or altering parts voids certification |
At Junsee Group, we provide:
✅ Complete full face respirator systems (NIOSH and CE certified)
✅ Replacement visors, valve flaps, and head harnesses
✅ Genuine filter cartridges for all common hazards
✅ Maintenance training and technical support
The bottom line: A full face respirator is only as strong as its weakest component. Understand each of the five core parts—and maintain them properly—to ensure your workers receive the protection they deserve.


Your email address will not be published. Required fields are marked